Authors: Melanie Mauch & Robin Swart
LDAP user authentication
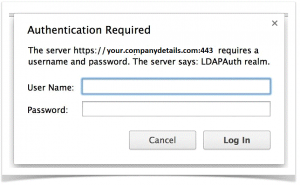
A Lightweight Directory Access Protocol (LDAP) server is one of the most popular methods used to manage users within organisations. Typically, internal software systems require users to authenticate against an LDAP repository, which can be tedious to implement in code. This blog provides a lightweight LDAP authentication solution that is quick and easy to implement using the web container provided by the application server. Specifically, this blog guides you in configuring LDAP authentication with Wildfly and WebSphere.
Using only the configuration given in this blog, a popup will be displayed in the browser when trying to access a restricted page. No extra coding required!
Project configuration
Add the following security configuration to your project’s web.xml file.
Each <security-constraint> tag specifies an access restriction to a set of resources. Inside the <security-constraint> tag, there can be one or more <url-pattern> tags that specify which web resources are restricted. The <http-method> tag specifies which HTTP method for this resource is restricted. If we specify GET and POST, it means that ONLY GET and POST requests to this resource will be restricted. Any other HTTP method will be allowed. If no <http-method>tags are specified, then ALL HTTP methods will be restricted.
Note that you can add more than one <security-constraint> tag to your configuration. In the example below, all HTTP GET and POST requests on any of the web-app’s resources (web pages, servlets, etc) will be restricted.
In the <auth-constraint> tag, one or more <role-name> tags are specified, to say which LDAP groups will be granted access to the restricted resources. Replace LDAPgroup with the LDAP group name that your intended users are part of.
web.xml
<security-constraint>
    <web-resource-collection>
        <web-resource-name>HtmlAuth</web-resource-name>
        <description>application security constraints</description>
        <url-pattern>/*</url-pattern>
        <http-method>GET</http-method>
        <http-method>POST</http-method>
    </web-resource-collection>
    <auth-constraint>
        <role-name>LDAPgroup</role-name>
    </auth-constraint>
</security-constraint>
<login-config>
    <auth-method>BASIC</auth-method>
    <realm-name>LDAPAuth realm</realm-name>
</login-config>
<security-role>
    <role-name>Manager</role-name>
</security-role>
Wildfly
For the purposes of this blog we used Wildfly 8.2.0, but this method will also work with other versions of Wildfly and JBoss.
Application server configuration
Add a security domain in your server’s config file (usually standalone-full.xml). Change all the values so that it corresponds to the details of your LDAP server.
standalone-full.xml
<security-domain name="LDAPAuth">
    <authentication>
        <login-module code="LdapExtended" flag="required">
            <module-option name="java.naming.factory.initial" value="com.sun.jndi.ldap.LdapCtxFactory"/>
            <module-option name="java.naming.provider.url" value="ldap://ldap.company.com:389"/>
            <module-option name="java.naming.security.authentication" value="simple"/>
            <module-option name="bindDN" value="cn=admin,dc=symbiotics,dc=co,dc=za"/>
            <module-option name="bindCredential" value="password"/>
            <module-option name="baseCtxDN" value="ou=people,o=SymbioticsApplicationServices,dc=symbiotics,dc=co,dc=za"/>
            <module-option name="baseFilter" value="(uid={0})"/>
            <module-option name="rolesCtxDN" value="ou=groups,o=SymbioticsApplicationServices,dc=symbiotics,dc=co,dc=za"/>
            <module-option name="roleFilter" value="(memberUid={0})"/>
            <module-option name="roleAttributeID" value="cn"/>
            <module-option name="searchScope" value="ONELEVEL_SCOPE"/>
            <module-option name="allowEmptyPasswords" value="true"/>
        </login-module>
    </authentication>
</security-domain>
Add this configuration to jboss-web.xml (if your project does not have one, create one and place it in the same location as web.xml) to enable the LDAP authentication. Replace LDAPAuth with the name of the security-domain specified in the server’s config file.
jboss-web.xml
<?xml version="1.0" encoding="UTF-8"?>
<jboss-web>
    <security-domain>LDAPAuth</security-domain>
    <use-jboss-authorization>true</use-jboss-authorization>
</jboss-web>
Websphere Application Server
Application server configuration
In the WAS admin console, in the left-hand tabs, select Security.
Then check the Enable administrative security checkbox, as well as the Enable application security check box.
Below that, under User account repository, select Standalone LDAP registry from the list of available realm definitions.
Then select Configure.
Note: Once the configuration has been saved, select Set as current to make WAS use the configured standalone LDAP registry.

In the next screen, under Primary administrative user name, enter the full DN (distinguished name) of a user in the LDAP registry that will have access to the WAS admin console once the security configuration is complete.
Under LDAP server, select the type of LDAP server you will authenticate against. In this guide we will select Custom, as this has been tested against OpenLDAP, which does not appear on the list.
Enter the host name or IP address and port.
Under Base distinguished name (DN), enter the base DN of the registry.
Under Bind distinguished name (DN), enter the bind DN and password that WAS will use to search the registry.
Then select LDAP registry settings.
 If, in the previous step, we selected a known type of LDAP server, then these fields below will have been filled in with appropriate values and this step could have probably been skipped.
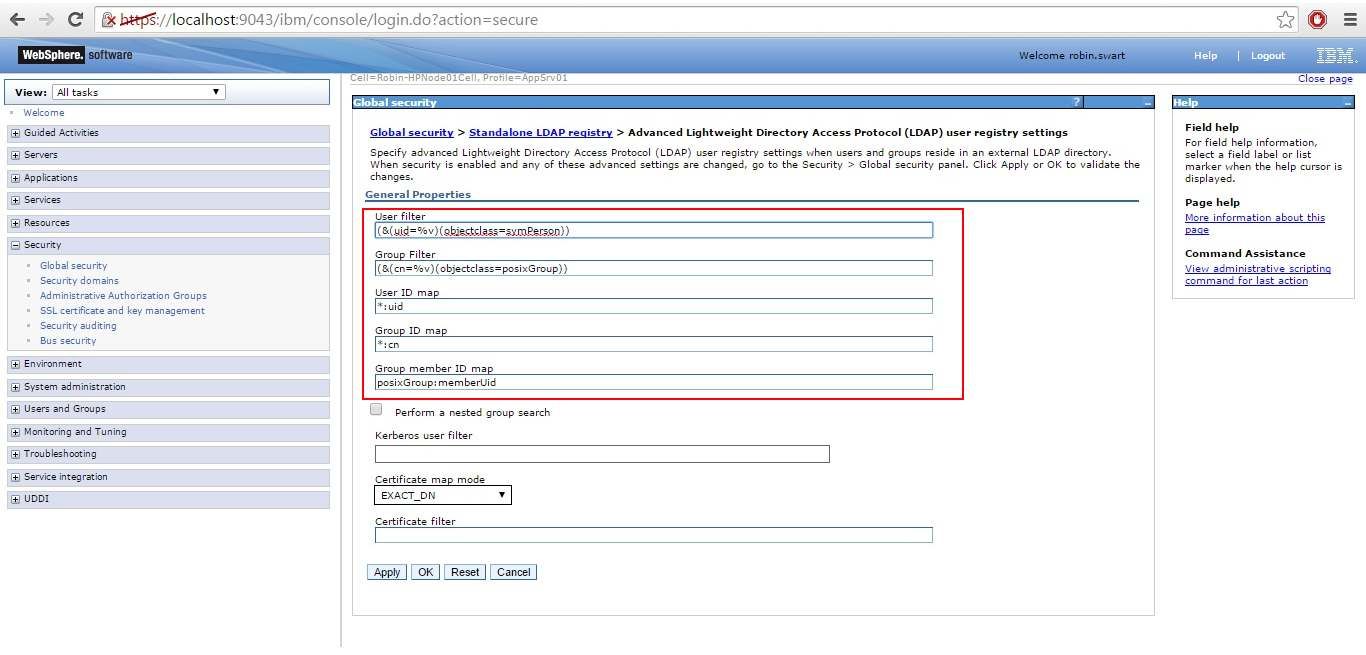
However, with a custom LDAP server, WAS makes no assumptions on the structure of the LDAP server regarding where to find users and groups, so we specify below.
User filter specifies which object classes to search when searching for users, and which attribute to match. Same applies for Group filter.
User ID map specifies which attribute of the user identifies it. Same applies for the Group ID map.
Group member ID map specifies the attribute of the group that names the members of the group.
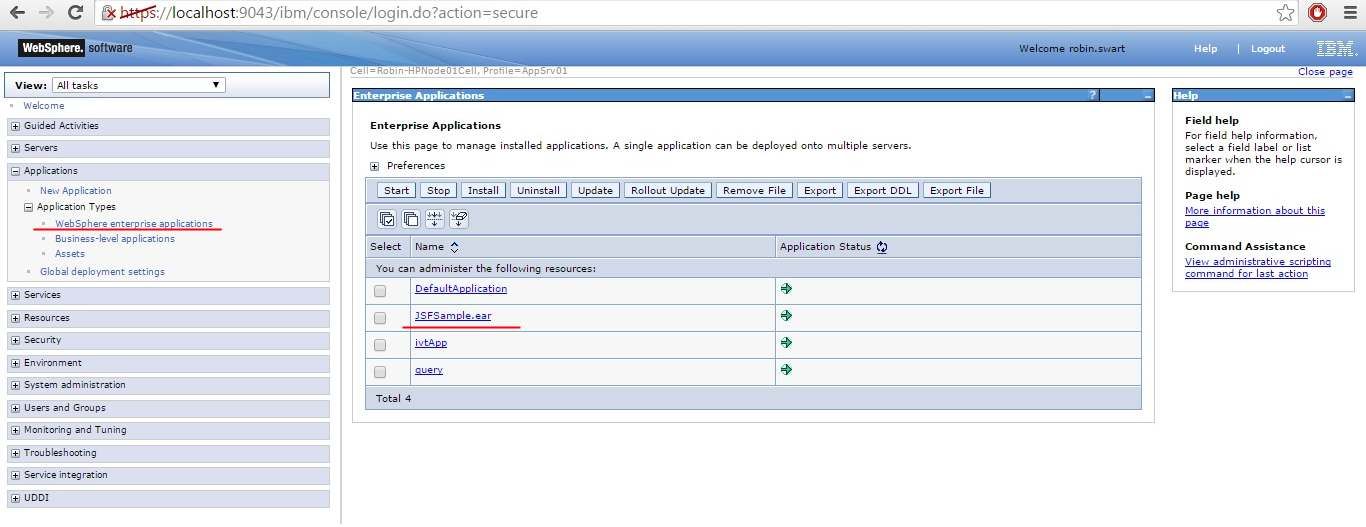
 Once the above have been completed, on the left-hand panel, select Applications -> Application Types -> Websphere enterprise applications, and select your deployed application.
Under Detail Properties, select Security role to user/group mapping.
 For each role present, check the checkbox next to the role and select Map Groups.
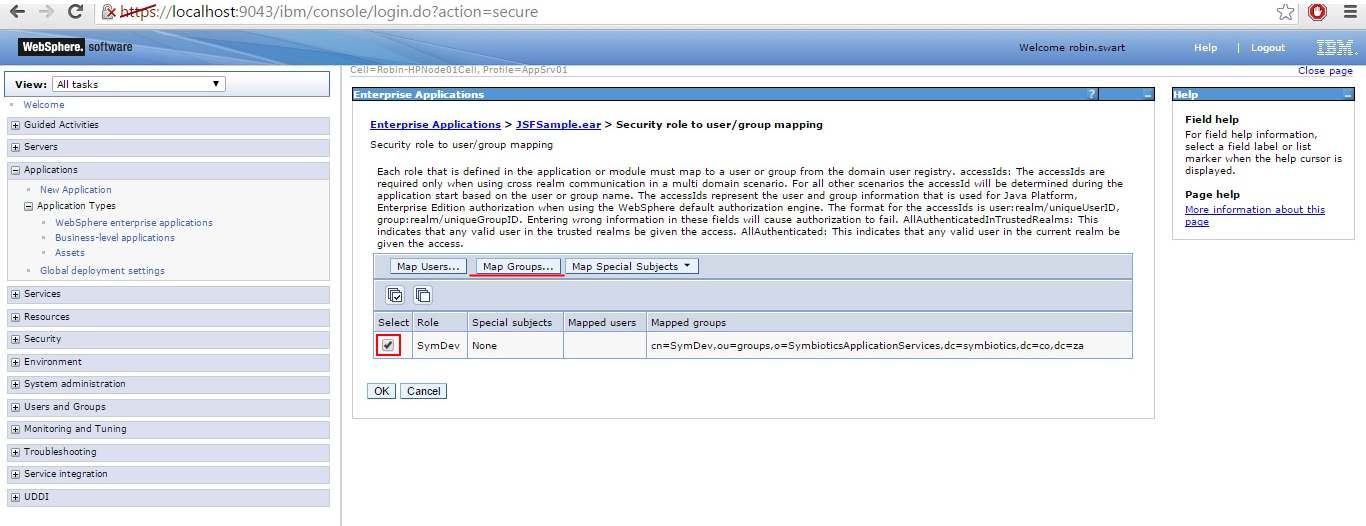
Select Search to retrieve all the available groups from the LDAP registry. Select the group that will be mapped to the role selected previously, and select the right arrow to move the group to the Selected section.
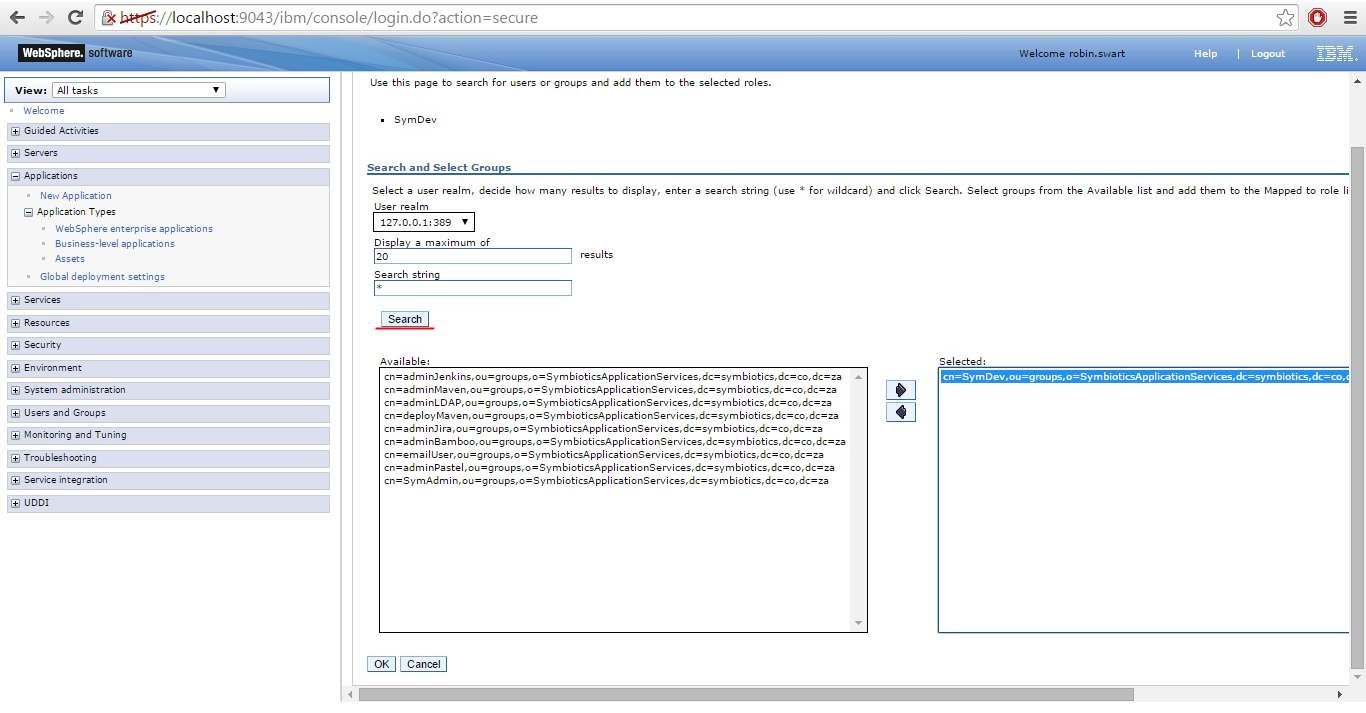
Once all the roles have been mapped to groups, save all the configuration changes you’ve made and restart the server.
Did you find this post useful? Please like us on Facebook to get updates on future posts!
